Some Things take Time

Unlike “Chipper & Shiplap”
or “Flop-Flop & Blondie”,
we are not an H&G TV show.

We do not have a bevy of contractors off camera,
ready to swoop in and “make it happen”.

We do it with a much smaller budget.

As a solo act, with a weekend helper,
I’m satisfied with the timeframe this has taken.

Our first project was over 10 years ago.

That house took 3 years to complete,
but it was totally paid for when it was done.

Newcomb

Now it earns us a nice monthly income.
In another few weeks,

this one will too.

Thanks for following us and all your comments!
Stay tuned, we will keep you posted
as we wrap this up in the coming weeks.

Hall floor Follow-up

By the time I got done fussing with the old boards,
I spent the better part of two days putting this floor down.

I laid it at a 45 degree angle to the sidewalls
for both aesthetic and structural reasons
and it was worth the extra labor.

Although it took longer than expected
and I barely had enough material,
even with the extra footage I aquired from my friend,
the results are great!

floor refinish 12

I will have to seek out something else
for the upper landing and hallway space though.
I have just enough flooring left to do the lower landing.

Since the landing has a curved step,
I decided to make a paper pattern of the exact shape.
I will glue the flooring together back at the shop,
then cut the solid piece to the shape.
This will allow me to make a custom bullnosed end cap
and join it to the floorboards, resulting in one piece.

floor refinish 6

I can then mount this to the subfloor on the landing
with adhesive and screws from underneath.
I’ll match the same diagonal format and stain the treads
including the stair treads the same dark finish
as I used on the hall.
I think it will look seamless and well planned.
If I’m lucky, it will look like it was original to the house.

Even though we are reusing
some of the original material on this reno,
this house never looked this good.

For the living room, kitchen and dining room,
we have chosen a wider plank style laminate,
in a dark teak finish which should blend well with the hallway.

No carpets will be installed anywhere
since we are renovating as a pet friendly rental.
You can charge a higher rent for tenants with pets
and we find there are a lot of responsible pet owners
who want a nice place to rent
and are willing to overlook a less than desirable location
or the lack of certain amenities.

There is no garage and a basement that won’t be available to the tenant.
But with three bedrooms, 1 & 1/2 baths, laundry and dining room,
this house should have plenty to offer
and we can get a premium.

We expect that the rent will pay back the total investment
in the first 3 years (not adding in for our labor of course).

What a long strange trip this has been and I for one,
will be glad when it’s over.

Reclaiming Old Hardwood Floors

We are in the final stages of this house restoration project.
I am finally getting to the sanding and staining
of the wood floors we took up over a year ago.

Sanding the boards was a messy job.
After a few trial attempts, I found a sanding belt
and a technique that didn’t gum up the belts too quickly.
I still used about $20.00 in sanding belts for
about 350 square feet of flooring.

floor finish 9

Overall the job took about 6 hours
to get them all sanded and stained.
I just hope I have enough for what I need to do.

I knew I wouldn’t have enough from what I reclaimed
during the initial demo to cover the areas where I wanted to use it.
As luck was in my favor,
a friend had some similar used flooring
in the attic of his garage that he had aquired and didn’t want.

The flooring I removed from the house is a different wood
than that which he had,
but the size and profiles looked the same,
so I took it thankfully.

floor refinish 5

Later, upon closer inspection,
I discovered that one has a thicker tongue,
so it won’t marry with the groove of the other.
However, the thinner tongue will fit in the wider groove
and the surfaces are still flush.

This could work, as long as I am careful how I lay it.
The two woods are different too.
One is a soft, probably spruce and the other a hard maple.
I wasn’t sure how they would take the stain.
After sanding, I was able to apply the dark teak stain to each
so that they look pretty good together.
If the tongue and grooves were exact matches,
it would allow me to mix the two as I lay it,
which would look cool.

Since that won’t work and the spaces
I am using are small and in different areas,
maybe I can make this work anyway.

I am laying the reclaimed wood floors in the new hallway,
the lower stair landing and the upper landing/hallway.
If I’m lucky, I can use one wood on the lower areas,
the other on the upper areas
and no one will really notice that they aren’t the same.

Wish me luck!

I’ll post photos of the results.

The Job That Doesn’t End

Like, “The Song That Doesn’t End”, so goes this house project.
“It goes on and on my friend”…
Spring has arrived and the sign shop is busy.
But thanks to the mild winter,
we have been able to make
great progress on the rehab project.

We are done with drywall, most of the trim work
and are now busy painting.
Once the paint is done, we can lay the floors,
finish a few details and finally, (hopefully),
turn the keys over to a new tenant.
Having the cash flowing in, instead of out,
will be a big relief!

I haven’t been good at keeping up with the blog
and part of that, is because there wasn’t a lot to write about.
The work that was going on
just wasn’t that exciting to write about.

I decided to do some progress shots
 again,
just to remind myself of where we have come from
in the last year and a half. It’s thearapudic for me.

The stairway was just one of the transformations
this old house went through.

The upper landing is another area that adds character to this little home.

Neighbors and friends who have come by to see the work
all have a common comment,
“Wow, there is a lot of space in this house”.
We really only made a few changes to the floor plan,
adding a full bath to a previously unused space at the top of the stairs.

We created a half bath/laundry
from
 what was the old bathroom.
We also took out a closet on the main floor
next to the stairs which created a center hall.
This one change, created a better flow,
while giving the feeling of a much larger house.

We are planning on downsizing our own life in the near future.
Maybe this will be the place we will wind up in.
I could live here.

Drywalling is FUN!

Here at the reno project, we are well into the finishing phase.

Let the fun begin!

Spring stairs before

before

hall 1

after gutting

hall 2

finally taping drywall

We are now taping drywall, which has to be
one of the messiest jobs in the reno business.
Somebody’s got to do it and that would be me.
I have done my fair share of it
and although I don’t claim to be a Mud Monet,
I can get the job done.

hall before

what was the downstairs bathroom, becoming a hallway

hall 4

a better use of space

Out of all the reno work I have done,
I have yet to work on a “new build”.
You know, those brand new houses,
where the studs are all correctly spaced
and the corners are square and plumb.

All my jobs have been in houses older than me,
by at least thirty years.
This one, by almost a hundred.

Not only does that make hanging the drywall a challenge,
but there is almost never a tight seam.
Square corners? There aren’t any,
which can make taping and mud work a real mess.
Not a job for the perfectionist.
You have to be creative…
and remind yourself, that this house is older,
or at least as old as the dirt it sits in.
It has, what I like to call, “character”.

entry before1

living room to entry before (shows the original closet)

entry 3

this was after taking out the closet and installing new stairs

After rehabbing several of these,
I’ve developed a little “character” myself.
Everything takes more mud, more tape and more layers.
I have had some projects where I have opted for a finish of textured,
paintable wallpaper, awesome stuff,
hides a multitude of sinfully bad walls.
In the end, it always looks better than it did before.

landing before

upper landing before

landing 2

upper landing now with the new stairs

With this house, all the lath and plaster had been removed
and replaced with new drywall. Right…
The three bedrooms and the living room
were the only rooms we didn’t gut back to the studs
and we may still have to.
The last person who did the drywall did such a poor job,
I’m not sure there is enough mud at the home center to cover it.
Every seam is visible
and some have the paper tape loose enough that it pulls right off.
Good, I can re-tape those at least.

br2-a1

they never even taped the ceiling joints

In the end, I have to remember that this will be a rental
and all the walls will be painted a flat beige which hides a lot.
Also, when you fill the rooms with the stuff of life,
no one will see most of the flaws anyway.

So it’s on to applying mud, sanding it off and applying more.
Hopefully, we will be painting soon!

We’ll keep you posted.

It’s Been A While

Well, it’s been a while since my last blog.
We had to take the last of December and all of January off
from the rehab project as the work in the sign shop was heavy.
Unusual for this time of year
but three big clients all ordered major work at the same time
and it was a little overwhelming.
This job was a portfolio piece for us.

Aviator road 1a

Aviator wall 4a

The kind of work we love to do.

We are back to the house now that it’s February.

promo 1

promo 2

Remember, we were going to have this done
and rented by May, of last year, or at least by June.
Hahahahaha! Boy were we wrong!
Anyway, I have been busy the past week
getting all the new plumbing installed.
I can do plumbing, but I am not as good a plumber as I am a sign man.

plumbing 1a

Not the neatest job, but at least it’s in and NO LEAKS!

Now I can start the tile work in the upstairs bath.
Once that is done it’s on to finishing the drywall in the closets.

This April is looking more realistic for a completion date.

Here are some before and after photos of the new bathroom.
Here, all there was before, was an odd open area at the top of the stairs.

landing-a1

bath11-23-1a

bath up 1a

and the old bath that is now a half bath/laundry.

ba_4a

demo 21a

half bath 2a

I know, some of this looked better before we gutted it. Trust me, the photos are deceiving.

Thanks for staying tuned in.
I will try to keep you posted more regularly,
now that we are on the home stretch.

The List Is Getting Smaller

Yay!
I was able to cross off two more tasks from the list
and I haven’t added anything new,

yet.

First, we finished the rear roofing project.
It has been unseasonably warm which really helped.

rear wall 2a
before

roof 12-7-1a
after

As you can see when I took this photo,
I still had one piece to trim and the flashing to do.
That’s now done.
This buttons up the outside work.
The only thing left, is some trim paint,
which can wait until spring.

So let it snow!

Second, I have completed the framing upstairs.
The new bathroom is roughed in and the tub is set.

bath before 12-8-1a
before

bath11-23-1a
getting it started

bath 12-6a
all framed

All three bedrooms now have closets famed

(there were no closets in these rooms before).

closet 12-8-2a
Front Bedroom

closet 12-8-1a
 Rear Bedroom

landing 12-8-1a
Landing/Small Front Bedroom

I think I may finally be done buying 2x4s!

It sure is nice to be crossing some stuff off the list.
Everything is now ready for drywall,
which should take about 30 – 4×8 sheets
and a couple 4x10s to finish.

First I need to install the water heater,
run all the supply lines and get the drains in.
I need to do the plumbing
before I can close in the ceiling
in the half bath laundry.

Yea, I do plumbing,
but it’s not my favorite.
At least with the new methods,
I’m not sweating pipe anymore.

The end of this project is in sight.
However, we are very busy in the sign shop,
especially for December.

shop 2a
 The Shop

shop 1a
 The Shop

shop 3a
The Studio

So finding time to work on the house is hard.

I’m not complaining though,
because the project house is a big old hog sucking cash,
and not spitt’n any out.
With the shop busy, at least there’s money flowing,
to feed that pig.

It was a year ago last week that we closed
and took possession of this property.

Spring St pic1b
The First Picture

roof 3a
Today

We had high hopes of having it rented
in six months.

Check out a few of my first posts,
you can clearly see my enthusiastic optimism.
Boy, was I wrong.

It looks like we may be done by late February.
Still, 14 months to do all that we’ve done
is not too bad, considering this is just a part time gig.

Spring St Promo sheet 1aa


They say “time flies when you’re having fun”.
Seriously? Is that what we’ve been having? FUN??

It’s coming up on a year since we closed on this property.
I was sure we would bang this reno out in five months, six tops.
Boy, was I wrong!

I guess though, as a part time gig for a band of one
(with a weekend helper),
we’ve done pretty good.

When I look back at all the blog entries,
it helps me to remember the crap we’ve been through.

ext front 14a

exte east 4b

porch roof 1a

framing DR8a

cabinets20a

tilework11-22-1a

There is still plenty to do however,
before we start raking in the rental income.

There is a complete bathroom to frame in and finish,

bath11-23-1a

three bedrooms need closets,

bedroom 11-23-1a

the main hall needs drywall,

hall11-23-1a

all the plumbing supply and drains need to be installed,
including a water heater.
There are doors to hang,
we still have a few add on electrical runs to get to,
plus all the floors have to be laid.

Then, we can trim the upstairs,
paint it all,
buy the appliances
and declare it DONE!

Did I mention that I ordered the 17ft. metal panels
for the back roof?

siding back 19a
Yea, forgot those.
They are scheduled to be here next week.

It sure has put a strain on cash flow,
but when it’s all said and done,
we’ll still be well above water financially.

Did I mention water? Oh yea,
just yesterday I read in the local paper,
that the Village is having water issues.
Seems the infrastructure is so old
it’s causing residents to complain about brown water.
Since all we have plumbed so far
is an outside faucet and one toilet in the half bath,
I haven’t paid much attention to what little water we use.
But, thinking back, it did look a bit brown a few times.
I thought maybe they were flushing hydrants someplace.

I’ll check my assessment.
This may be an issue we need to address
on the next tax grievance day.
This hobby is not for the faint of heart.

My AFib is p-p-ppp-r-r-r–oooo—f-f of that.

Decisions, Decisions

Spring St Promo sheet 1aa

Why are there so many choices to make?
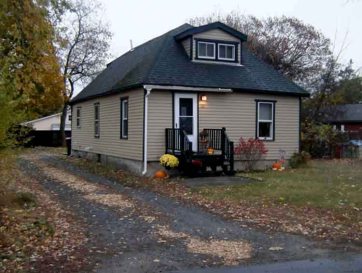
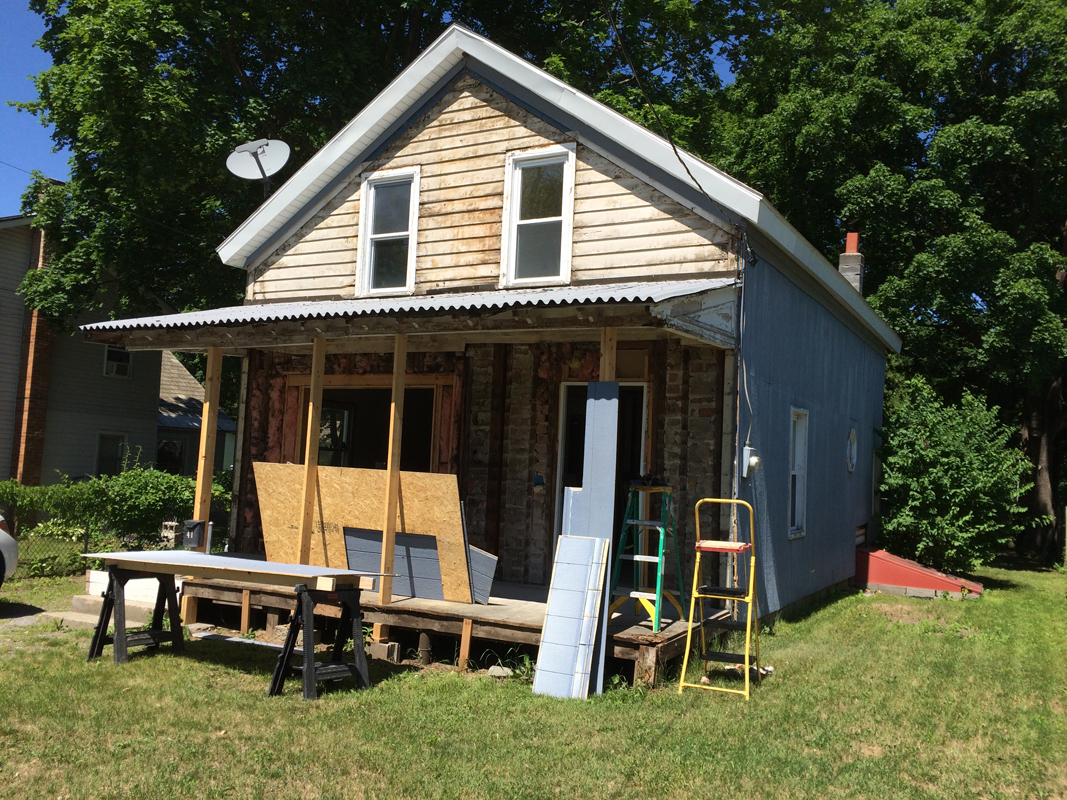
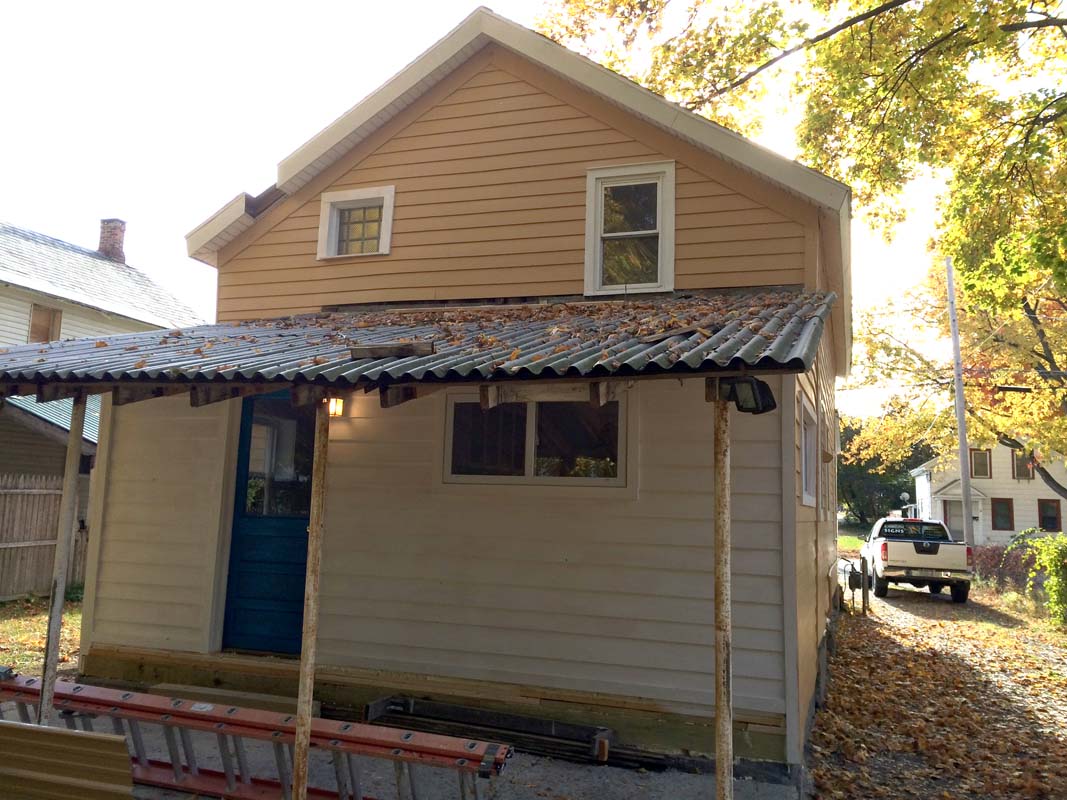
The covered concrete deck on the back of this house,
which is about 6ft x 16ft, is in bad shape.

siding back 20a

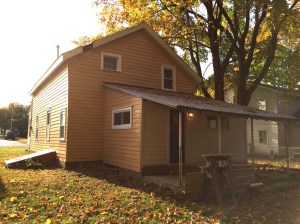
Who ever poured the concrete didn’t do it well.
Not only is it uneven and not level,
it is also cracked and crumbling.
So what to do with it?
I could break it all up and pour a new 4” pad,
but the area is not accessible to a cement truck.
The expense and back breaking labor for this option,
is not my first choice.
To top dress it with a thin coat is also a big project
using off the shelf 80lb bags of “quick crete”.
Again, not a good option.

I could I put a wood deck over the concrete,
but that would raise my floor more than a thin coat of cement.
A wood deck would be much nicer,
but it would be more expensive,
but it would require less back breaking labor.
UGH, decisions decisions.

siding back 19a

While we’re trying to decide,
the first thing to do,
is to take out the round steel posts
and replace them with wood and add a header,
since the idiot that put them up never did that.

back deck 4a

This will required a temporary header and supports.

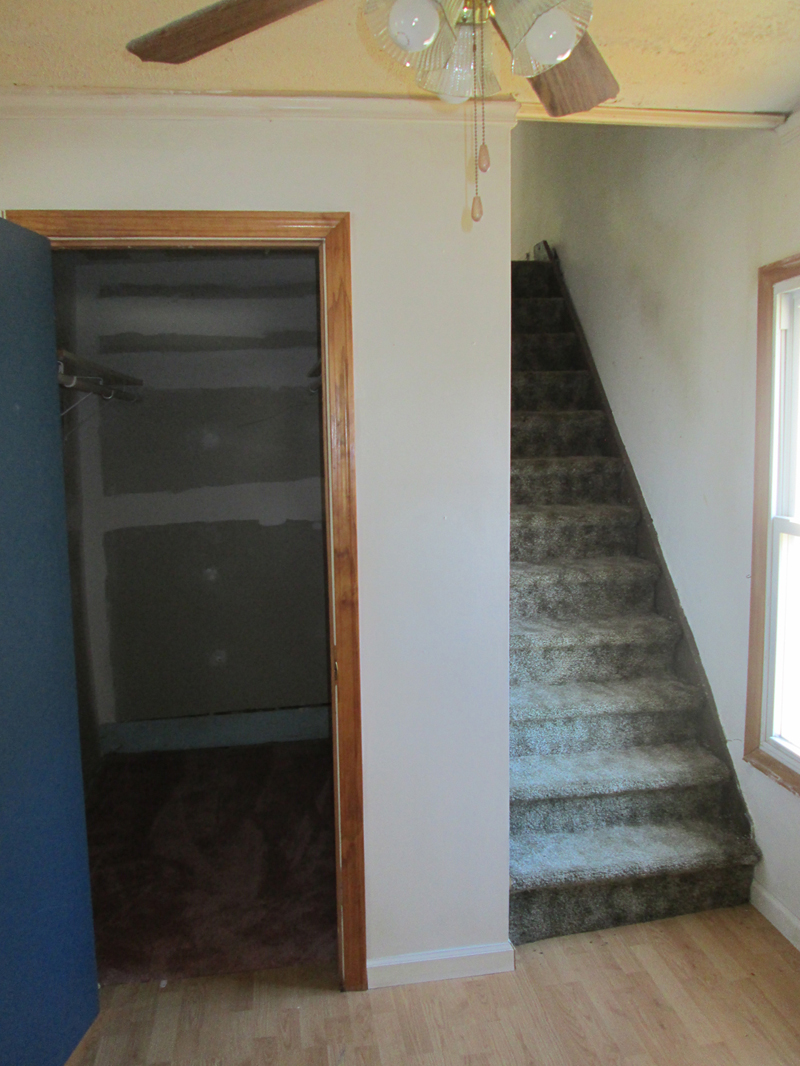
Because there is limited head room already,
I decided to buck up,
mix concrete myself by the bag,
pour a thin coat over the top and be done.
So I built a form.

back deck 6a

However,
I discovered that in order to level the high spots,
I was going to have to pour at least 2”
and up to 3” in some places.
this would raise the floor and reduce my head room,
which I was trying to avoid.

The end result would still be a thin,
cheap concrete surface, susceptible to breaking up in time
and maybe sooner than later.

After much discussion,
we finally decided to spend, again,
a little more and go with wood.
Not until after I had spent a whole afternoon
forming it up for the concrete option.
Just rip that out, no problem.

back deck 5a

Now that we’re going with wood,
the next decision was how to float it over the concrete
and get it level without raising it up too much?
It will also have to be pinned to the concrete in order to be tight,
unless I used heavy enough joists to suspend the floor
without having it sag.
Wider joists would sacrifice even more head room.
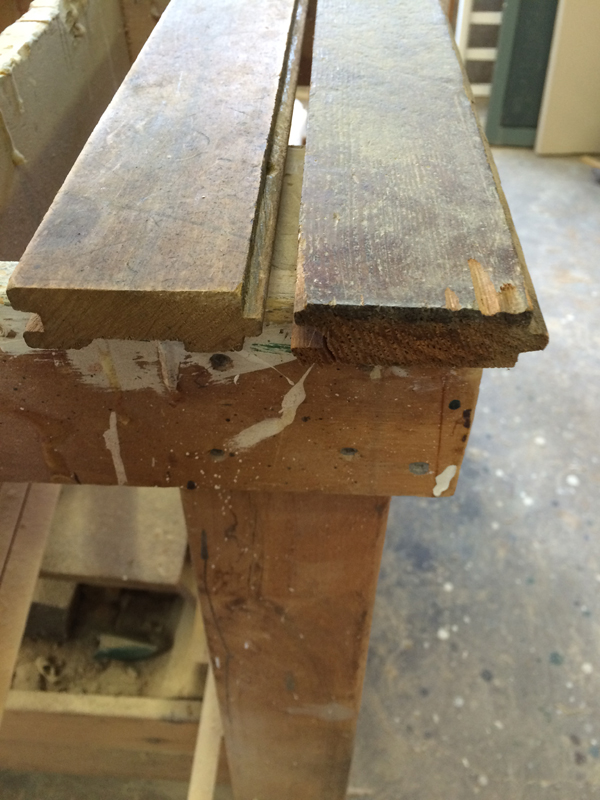
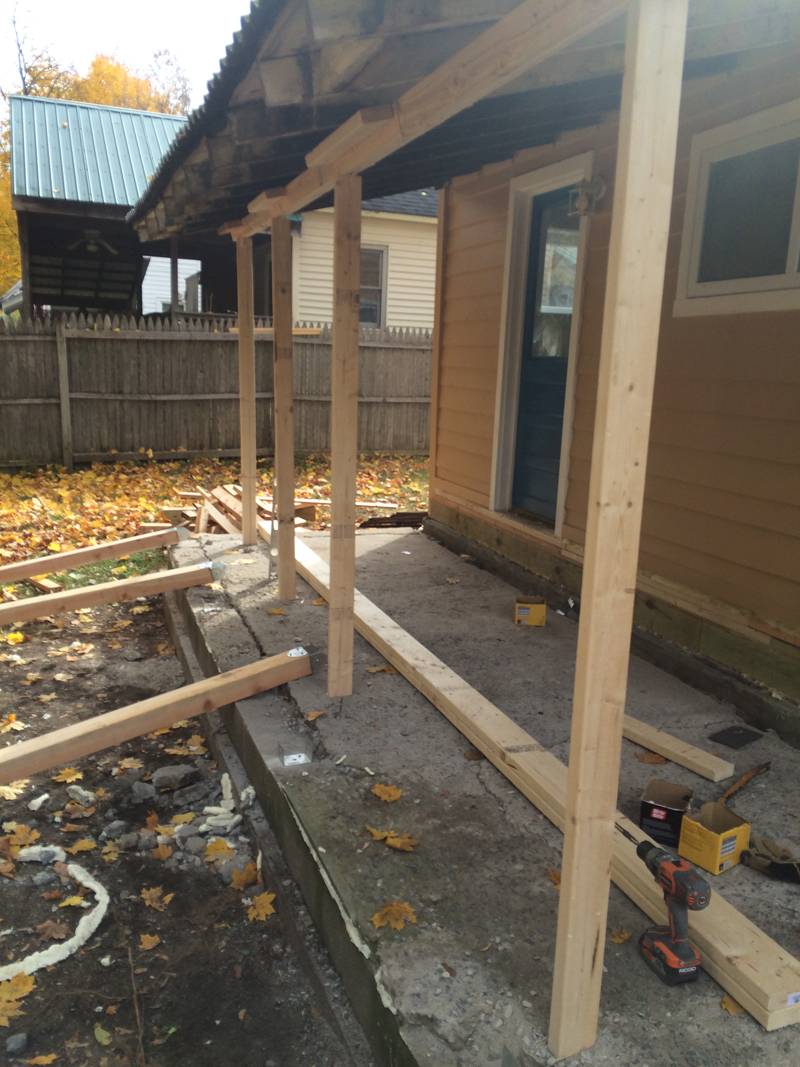
I chose to use 2x4s, setting them on edge,
on the concrete and pinning them down.
But since the existing floor is so out of level and uneven,
I will have to custom rip each one to fit the contour of the cement
while maintaining a flush surface for the decking.
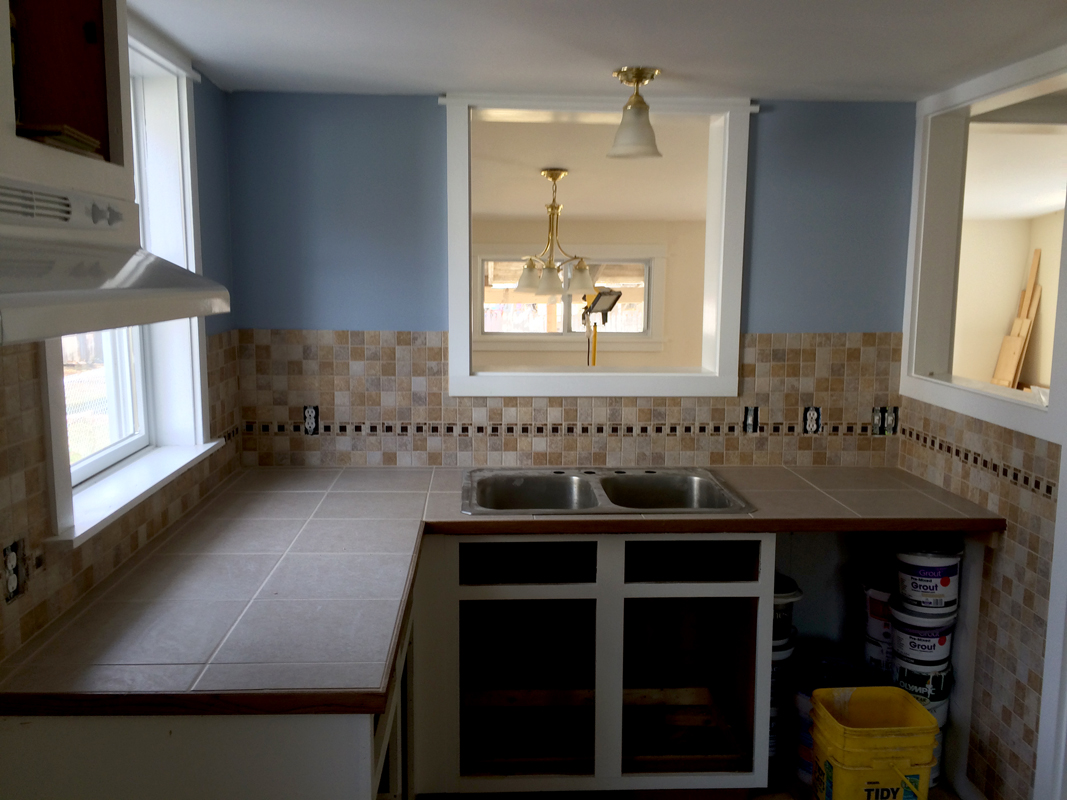
If you remember back a few months,
I blogged about doing the same thing in reverse with the kitchen ceiling.

Nothing with this house has been easy.
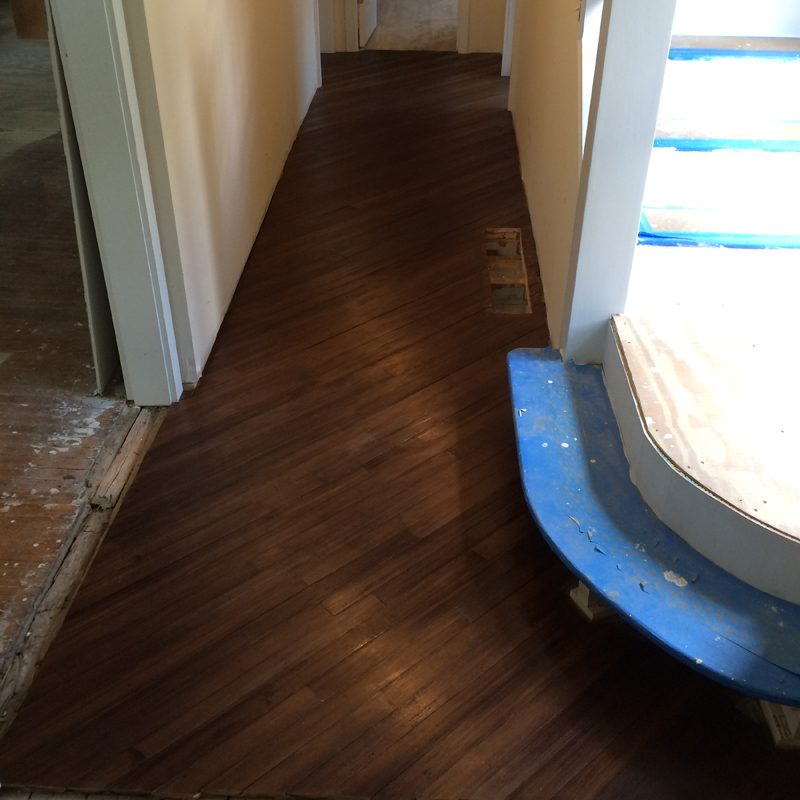
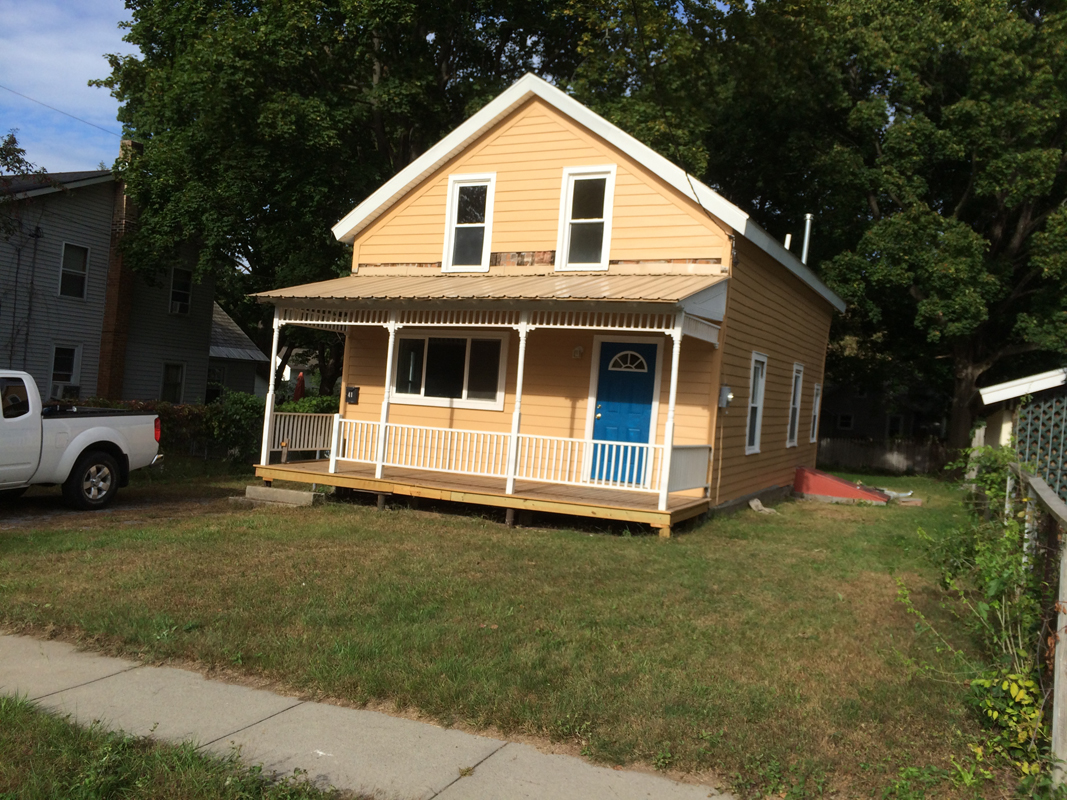
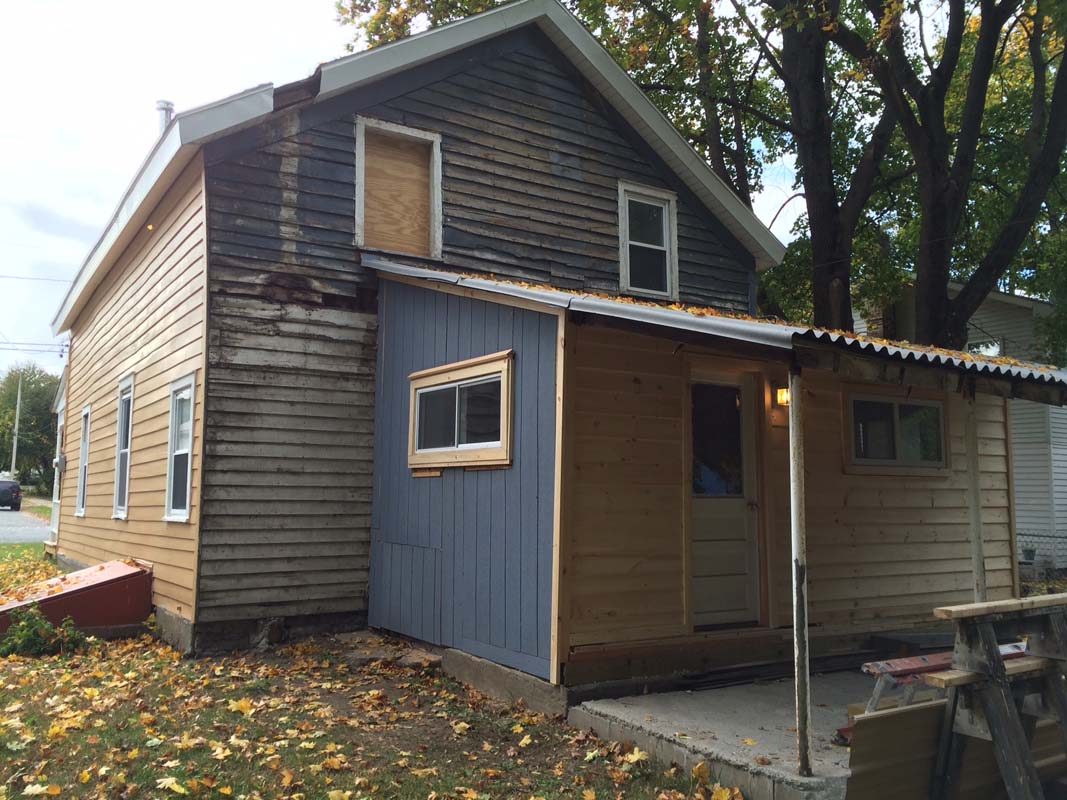
As you can see by the pictures,
the header and new posts are in place
and the framework for the deck is going down.

back deck 3a

Total for the header, post and decking was about $350.
so not too bad.
Plus it will look great when finished.
This was also easier on my back
than mixing all those bags of cement by hand.
Now that the decisions are made,
the materials are at the job,
the work should go quickly.
Time to order the roofing.
Stay tuned we’ll keep you posted.

Spring St Promo sheet 1aa

Well, the weather here in the north country should be getting colder,
but luckily the temps are holding.
We are just about done with the exterior phase of this project.
The back, which is the last frontier for the siding work,
is just about complete.
With all the new siding on, primed and mostly painted,
It looks like we will be done with this soon.

ext-a14a   rear wall 2a

rear wall 27a   siding back 3a

siding back 18a   siding back 20a

This week’s forecast is for daytime temps in the 50’s
which will allow that work to get done as long as it stays dry.

I still have to cover the underside of the roof area
with luan and paint it,
order new roofing and get that installed,
as well as top dress the rough concrete patio.
Most of the trim on the building still needs finish paint
and I hope we can get that done too.

The exterior proved to be the biggest labor challenge of this project.
With the purchased siding and paint,
I think we are under $1200.00,
which is still cheaper than having vinyl installed.

The paint we used is Benjamin Moore’s “Aura” low luster,
which is their high end coating.
I hope we’ll get 10 – 15 years of service from it
before it will need to be painted again.

As soon as I get all of this done,
I can take some time off
and get to a few other projects elsewhere.
I have leaves to pick up and a chord of wood to split at home,
I have to drive up north and close up camp,
I have a small roof to build
over the entry to the upstairs apartment
at one of the other rentals.
oh, and the leaves need to be picked up there
and a final mowing on three properties.

Then, I could use a rest.
However,
I don’t see that happening any time soon.
Please don’t snow just yet!